*This post may contain affiliate links for which I earn commissions.*
You sit down, press play, and something feels… off. The music is there, but it’s not quite in front of you. The vocals seem to drift, instruments blur together, and the whole scene feels a little flat.
Then you nudge your chair forward by just a few inches, and suddenly everything locks into place. The singer steps into the room. The space between instruments opens up. That’s the quiet magic of improved imaging.
Let’s walk through how to find that spot.
Quick Supply List
1. Comfortable listening chair
Look for a firm seat with a straight back. Avoid deep, overly soft cushions that sink too much.
2. Measuring tape
Helps keep things symmetrical, even if you’re just eyeballing most of it.
3. Painter’s tape or floor markers
Useful for marking positions without committing permanently.
4. Area rug (optional but helpful)
A medium-pile wool or cotton rug helps anchor the space and soften reflections.
5. Small cushion or lumbar support
Keeps your posture consistent during longer listening sessions.
6. Notebook or phone notes
To track small adjustments. It’s easy to forget what actually worked.
7. Level (optional)
Handy if your floor isn’t perfectly even.
Set Yourself Up for Success
Before moving anything, take a minute to reset the space.
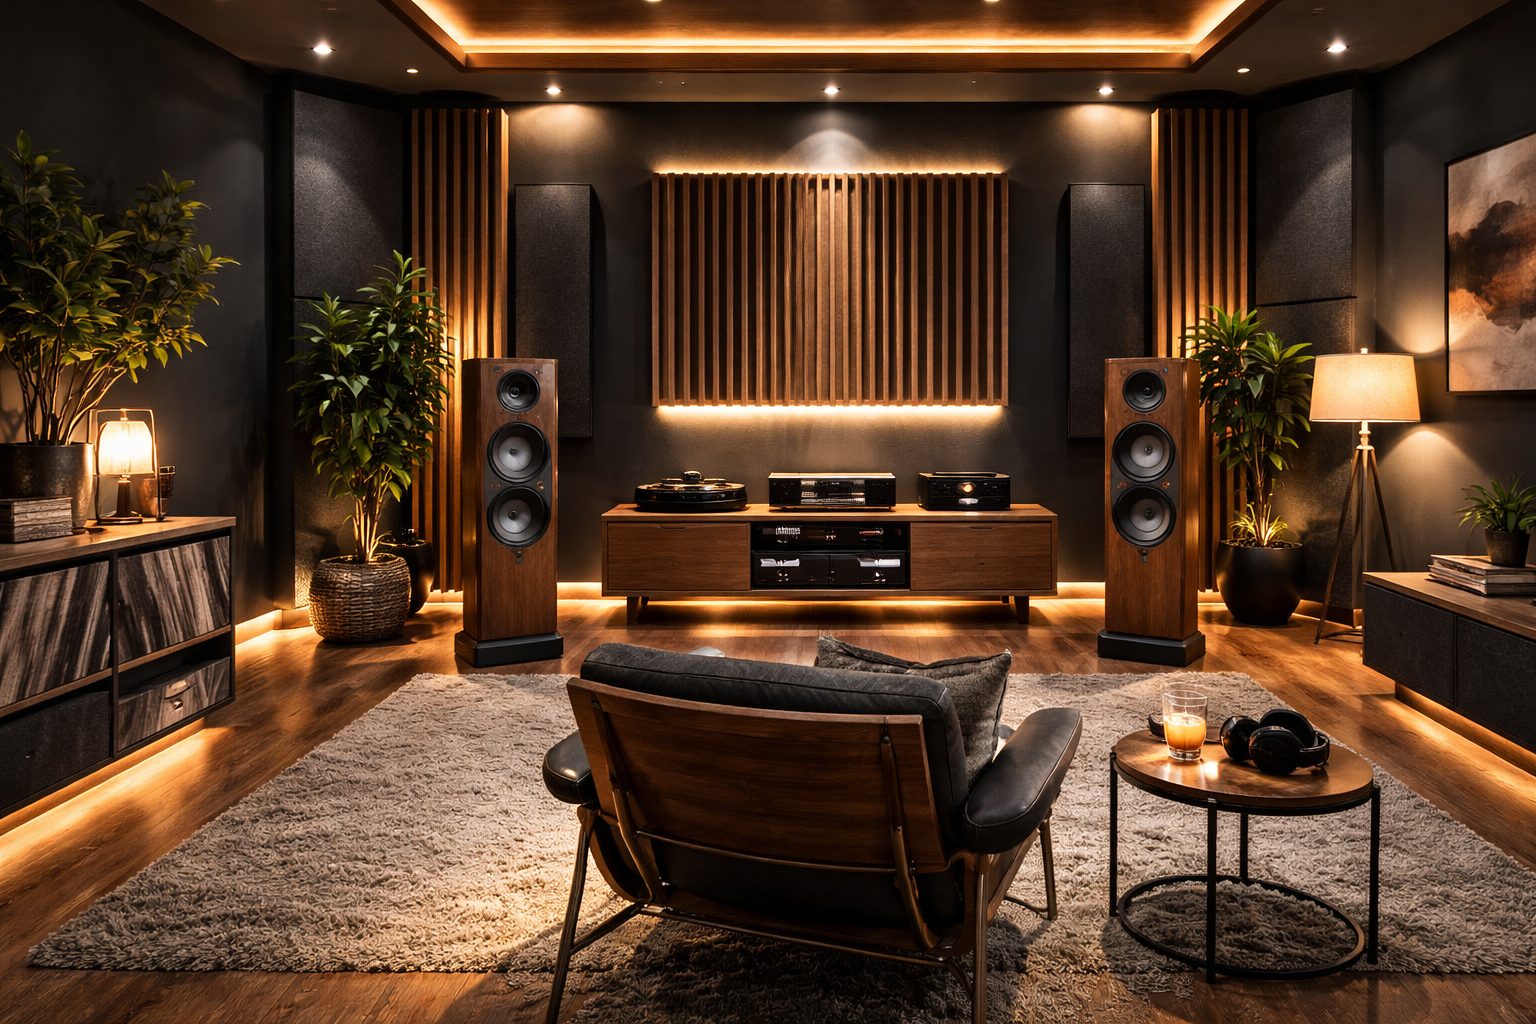
Start with your speakers already placed where you like them. This process works best when the speakers are stable, and you’re adjusting the listening position around them.
Clear the area between your speakers and chair. Even a low table can subtly affect how sound travels.
Sit down and notice your ear height. Ideally, your ears should line up roughly with your speaker’s tweeters, which are the small drivers handling high frequencies.
And one small thing that’s easy to overlook. Wear what you normally wear while listening. A thick hood or high-backed collar can slightly change how you hear the top end.
The Easy Steps
1. Start with the classic triangle
Place your chair so it forms an equal triangle with your speakers. If your speakers are 6 feet apart, sit about 6 feet away.
This is your starting point, not the final answer.
2. Center yourself carefully
Measure from each speaker to your chair. Even a difference of an inch or two can pull the image to one side.
Take your time here. This step quietly shapes everything that follows.
3. Sit and listen to a familiar track
Choose something with a clear vocal in the center. Acoustic or well-recorded music works best.
Close your eyes for a moment. Where is the voice sitting?
Quick checkpoint:
The vocal should feel centered, not leaning left or right.
4. Move the chair forward slightly
Slide your chair forward by 2 to 4 inches. Listen again.
You’re listening for clarity and separation. Often, moving closer tightens the image and brings details forward.
5. Move the chair backward slightly
Now go the other direction from your starting point. Again, just a few inches.
Sometimes the soundstage opens up more when you give it a bit of space.
Quick checkpoint:
One of these positions should feel more “real,” with better depth and placement.
6. Fine-tune in small increments
Once you find a promising spot, adjust in tiny steps. Even 1 inch changes can matter here.
Mark positions with tape as you go so you don’t lose your best spot.
7. Adjust height if needed
If the image feels slightly above or below you, add a cushion or adjust chair height.
Your ears should align closely with the tweeters.
8. Lock in your position
When it clicks, you’ll know. The center image becomes stable, and instruments sit in their own space.
Quick checkpoint:
You should be able to point to where each sound is coming from, even with your eyes closed.
Simple Upgrades
If you want to take this a little further, a few small additions can make the process easier and more consistent.
- Chair isolation pads to reduce floor vibrations, especially on tile or wood
- Thicker area rug for better absorption in the listening zone
- Adjustable listening chair with controlled height and firm support
- Floor markers or discreet tape dots for repeatable positioning
If You Get Stuck, Try This
Sometimes the image pulls to one side.
This is usually a symmetry issue. Measure again from each speaker to your chair. Also check if one speaker is closer to a side wall than the other.
The sound feels wide but blurry.
You might be sitting too far back. Try moving forward slightly to tighten the center image.
Everything feels too narrow and cramped.
You may be too close. A small step back can open up the soundstage and bring back some air.
The image shifts when you lean back.
High-backed chairs can reflect sound. Try a lower backrest or sit slightly forward.
(There was a time I thought my speakers were the problem, and it turned out my chair was just two inches off center.)
Make It Your Own
There’s no single “correct” position. It depends on how you like to listen.
Minimal path
Keep the triangle tight and precise. Chair centered, minimal furnishings, very focused imaging.
Cozy path
Add a rug, soft textures, maybe sit a touch farther back. The image softens slightly, but the space feels warmer and more relaxed.
Immersive path
Sit a bit closer than the triangle suggests. This brings you deeper into the music, with a more intimate presentation.
Final Quick Check
Before you call it done, take a quiet moment and run through this:
- Chair is centered between speakers
- Distance feels balanced, not too close or far
- Vocals sit clearly in the middle
- Instruments have their own space
- Ear height lines up with tweeters
- Position is marked or easy to return to
Once everything settles, you stop thinking about placement. You just listen.
Small tip: if the image ever starts to feel off again, check your chair position before anything else.